A sample text widget
Etiam pulvinar consectetur dolor sed malesuada. Ut convallis
euismod dolor nec pretium. Nunc ut tristique massa.
Nam sodales mi vitae dolor ullamcorper et vulputate enim accumsan.
Morbi orci magna, tincidunt vitae molestie nec, molestie at mi. Nulla nulla lorem,
suscipit in posuere in, interdum non magna.
|
The 2009 Hooked on Hydroponics grant from the National Gardening Association was awarded to the The Chattanooga Girls Leadership Academy, a single gender, small learning community for girls in grades 6-12.
The girls academy was selected from over 200 youth gardening programs throughout the United States to receive the 2009 Hooked on Hydroponics grant from the National Gardening Association in cooperation with The Grow Store and the Progressive Gardening Trade Association. This Chattanooga Girl’s gardening program will receive hydroponics kits consisting of grow lights, hydroponic nutrients, growing medium and hydroponic nutrient pumps. Hydroponic books and related educational materials from the National Gardening Association will also be provided to get the girls started with their new hydroponics projects.
The hydroponics grant will provide hands-on opportunites for the children to learn alternative hydroponic gardening techniques. CGLA was selected because they demonstrated commitment to actively and creatively engaging youth in hydroponics and sharing their experiences with the community.
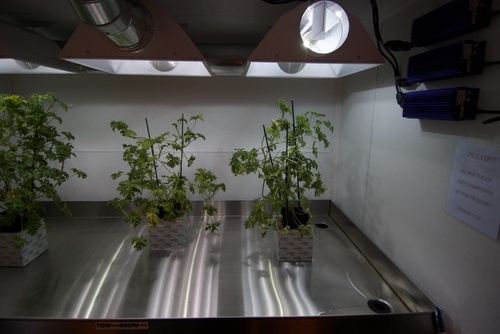
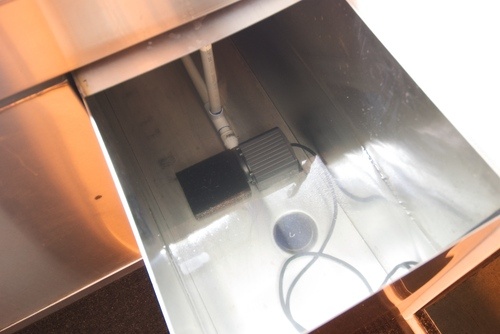
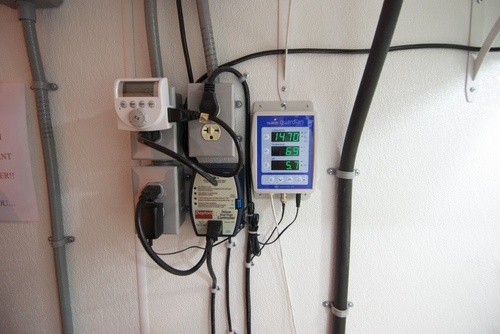
One of our forum members recently posted some pictures of his automated computer controlled hydroponics growing system. Using a combination of computer and some software and hardware pieces from Growtronix, he is able to automate many functions of his growing systems, as well as monitor and data log many essential environmental conditions.
The Growtronix Hydroponics System consists of networkable environmental sensors along with computer controlled power modules that can turn on and off grow lights, pumps, fans and any other related systems. The software application runs on a computer and allows the user to customize and automate their growing system. The system also contains a grow journal that logs the recorded data to produce graphs to analyze the data. Here are a few pictures of the system, special thanks to our hydroponics forum member Amigatec for sharing!
Pictured below is a self-sufficient mini-farm concept of a futuristic kitchen designed by Philips. Creating synergies between the fish, vegetables, plants and algae, this self sustaining biosphere can operate without electricity. The Biotoweruses only water, organic waste and the sun’s energy to power several small ecosystems connected to each other. From top to bottom, the levels contain:
Levels 1-2: hydroponic plants
Level 3: container algae
Level 4: Fish and Shrimp
Level 5: Organic waste
Optical fibers capture and redirect light to the plants during the day, while methane captured from organic waste can power lights at night.
 Philips Biotower
Coconut coir fibers are found between the husk and the outer shell of a coconut. The single fibers are narrow and hollow with thick walls. They are pale when immature but later become hardened and yellowed as a layer of lignin is deposited on their walls.
A couple of our forum members are using the Coconut coir as growing medium for their hydroponic setups. The coirs are shredded, washed and dried and then packed lightly together to form the growing medium. Since pH can be affected, one member is supplementing with rice hulls and course sand to balance things out. Read more about this on our forums: Coconut Coir as growing medium

Incandescent bulbs might be staging a comeback thanks to a new technology that seals the filament in a special, heat-reflecting inner-capsule. The inner capsule of these new bulbs are coated with a material that is able to reflect the heat back onto the filament, part of which is converted back into light. This technology, currently featured in Philips Halogena Energy Savers line, has resulted in the bulb using 30% less power and lasting 3x longer than normal incandescents.
Although CFL’s are still about more efficient than these new incandescent bulbs, these new bulbs will become more efficient over time and don’t take a long to warm up to full brightness.
Less heat is certainly welcome in the world of hydroponic grow lights, especially in tight or enclosed areas. We look forward to seeing how these bulbs perform in a real world hydroponic growing environment.
Incandescent bulbs might be staging a comeback thanks to a new technology that seals the filament in a special, heat-reflecting inner-capsule. The inner capsule of these new bulbs are coated with a material that is able to reflect the heat back onto the filament, part of which is converted back into light. This technology, currently featured in Philips Halogena Energy Savers line, has resulted in the bulb using 30% less power and lasting 3x longer than normal incandescents.
Although CFL bulbs are still about more efficient than these new incandescent Hydroponic Grow Lights & Bulbs, these new bulbs will become more efficient over time and don’t take a long to warm up to full brightness.
Less heat is certainly welcome in the world of hydroponic grow lights, especially in tight or enclosed growing areas. We look forward to seeing how these bulbs perform in a real world hydroponic growing environment.
Conserving nutrients and resources with hydroponic foggers
Aeroponic fogging also know as hydroponic foggers are used for numerous horticultural applications including root fogging, foliar feeding, growroom & greenhouse humidity generation. Ultrasonic foggers, also know as nebulizers are excellent aids to propagation and production as they can be used to create an excellent environment for all types of plants to grow.
An aeroponic fogger works by oscillating at a frequency of about 2 MHZ which is two millions vibrations per second. At this frequency, water is nebulized into a fog which can support the needs of plants using a low volume of water and nutrients.
There are different types of hydroponic foggers with the most common being the jet foggers, which are also called “atomizers”. Jet foggers are connected by tubing to a compressed air source that causes air or oxygen to blast at high velocity through a liquid to turn it into an aerosol, which can them be absorbed by the plants.
The hydroponic fogger can generates extremely small droplets that average only 2.5 microns, which is small enough to be absorbed by roots and leaves on contact, thereby being very effective using only an ultra low volume of liquid.
Aeroponic foggers also know as hydroponic foggers are used for numerous horticultural applications including root fogging, foliar feeding, growroom & grow box humidity generation. Ultrasonic foggers, also know as nebulizers are excellent aids to propagation and production as they can be used to create an excellent environment for all types of plants to grow.
An aeroponic fogger works by oscillating at a frequency of about 2 MHZ which is two millions vibrations per second. At this frequency, water is nebulized into a fog which can support the needs of plants using a low volume of water and hydroponic nutrients.
Another type of hydroponic fogger is a jet fogger, which is also called an atomizer. Jet foggers are connected by tubing to a compressed air source that causes air or oxygen to blast at high velocity through a liquid to turn it into an aerosol, which can them be absorbed by the plants.
The hydroponic mister can generate extremely small droplets that average only 2.5 microns, which is small enough to be absorbed by roots and leaves on contact, thereby being very effective using only an ultra low volume of liquid.
An increasing number of people are seeking a way to get organic quality foods and herbs by growing them using hydroponics. Hydroponics systems can help you grow plants at home using hydroponics trays and products that make is easier for certain plants that normally grow outdoors to grow indoors. Hydroponics is a growing media for those who want to make sure that they get nutrients in their foods.
Grow lights are one way that you can help your plants grow. Grow lights can be used on your hydroponics containers and aquariums and mimic actual sunlight. By combining grow lights with hydroponics systems, you can have an indoor garden and grow your own vegetables and herbs all year long. Best of all, you will not be missing out on any nutrients these foods provide for you. Instead of spending more money for organic foods, you can save money by growing them yourself.
Hydroponics combines nutrients in the soil along with aerated containers that will give the plants a chance to grow indoors. This is an even healthier way to grow plants as you do not have to worry about getting rid of bugs or chasing away animals that may come after the food. You can grow plants to fruition using this growing media.
You can even make your own hydroponics containers out of ordinary household containers once you get used to growing indoors. You do need a grow light that will give the plants not only the light, but the climate that they need in order to thrive.
An increasing number of people are turning to hydroponics as an answer to both saving money on vegetables and herbs as well as getting organic quality foods. Most of the commercial vegetables and herbs found in grocery stores are grown using pesticides and other harmful chemicals. In an effort to grow bigger vegetables, the plants are treated with chemicals that are not healthy. As a result, a great deal of people are seeking out organic foods that do not use this type of growing media. However, organic foods are often much more expensive for consumers.
Growing the vegetables and herbs yourself is an ideal solution, except that it can be difficult to do this unless you live in a climate that is warm all year long. Growing indoors using hydroponics and a grow lights is a viable solution for those who want to eat healthier foods and save money at the same time.
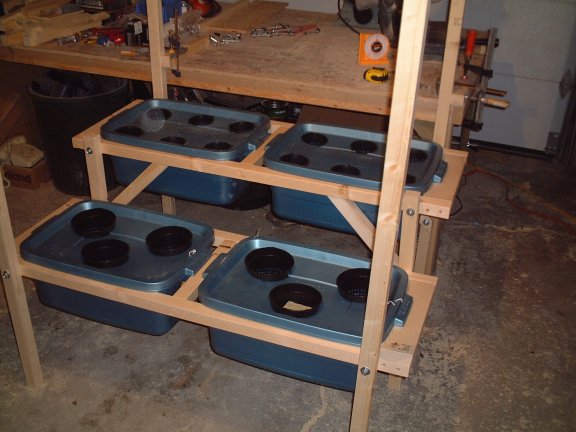
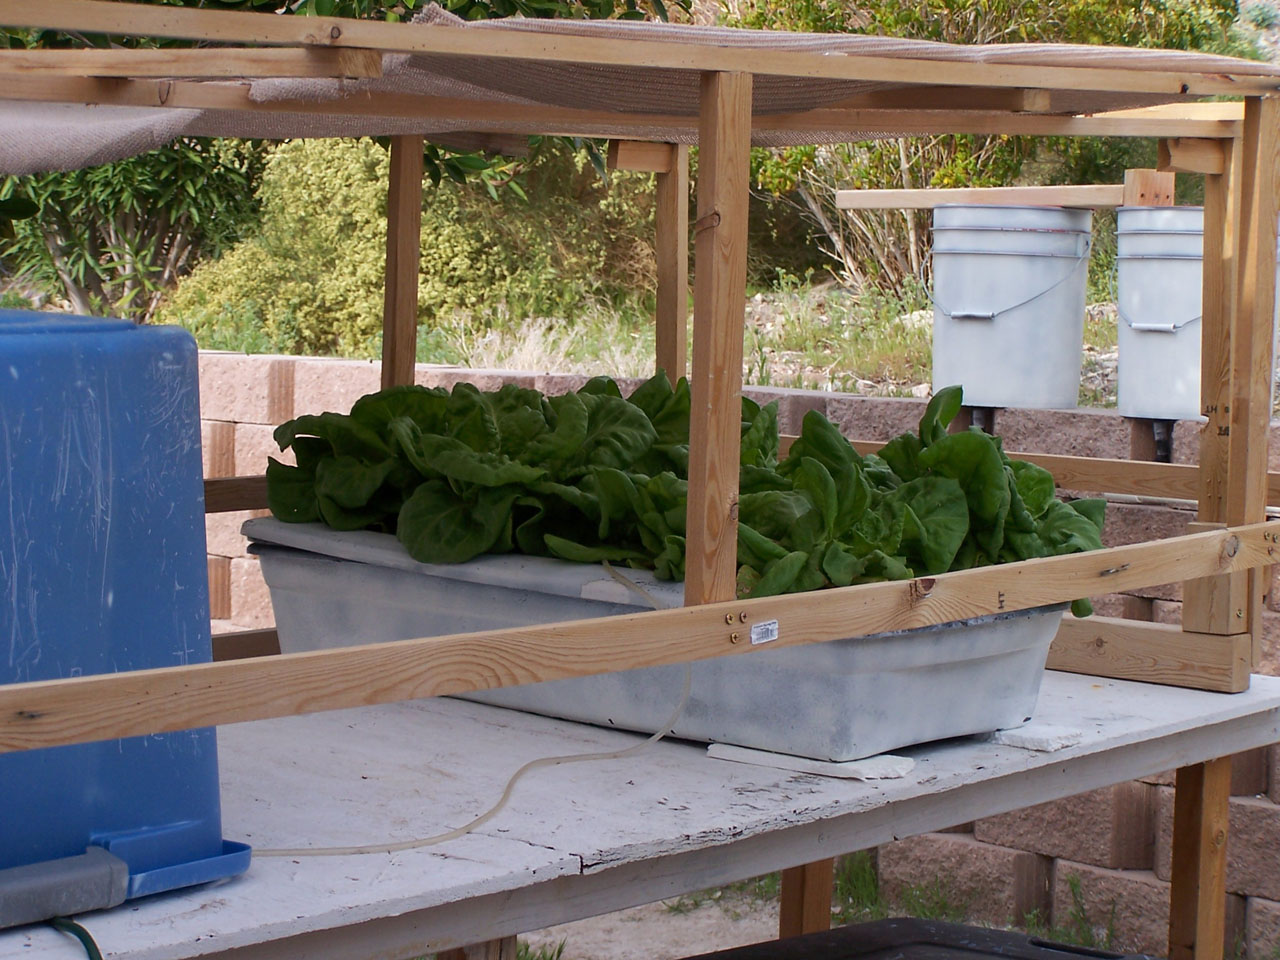
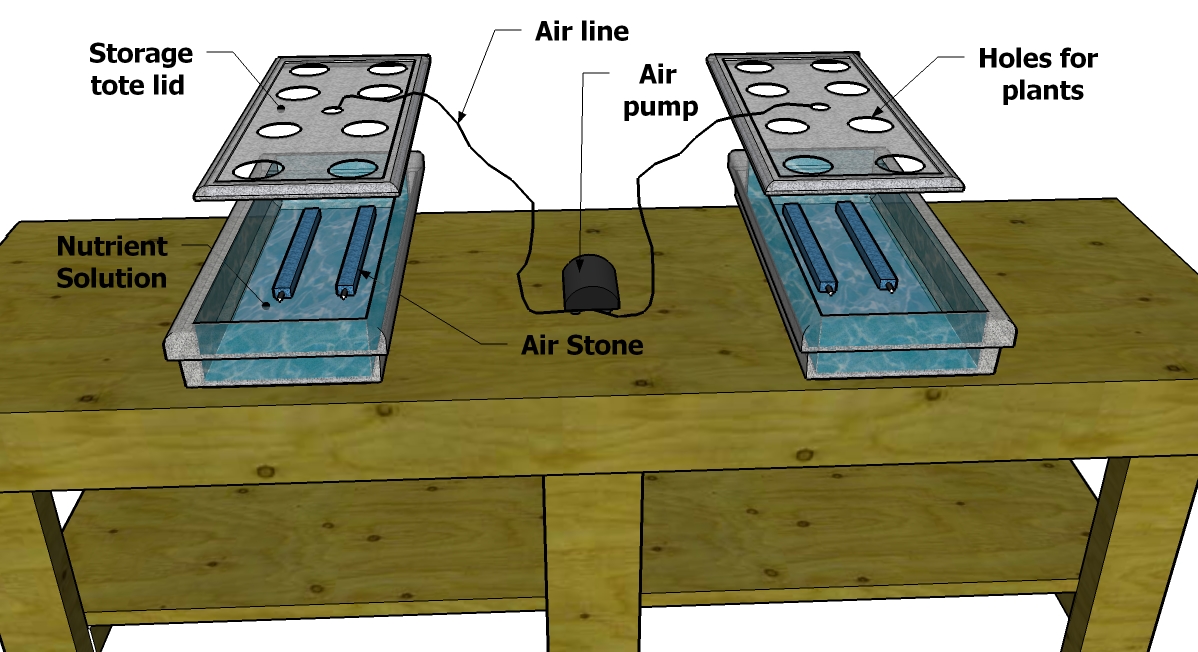
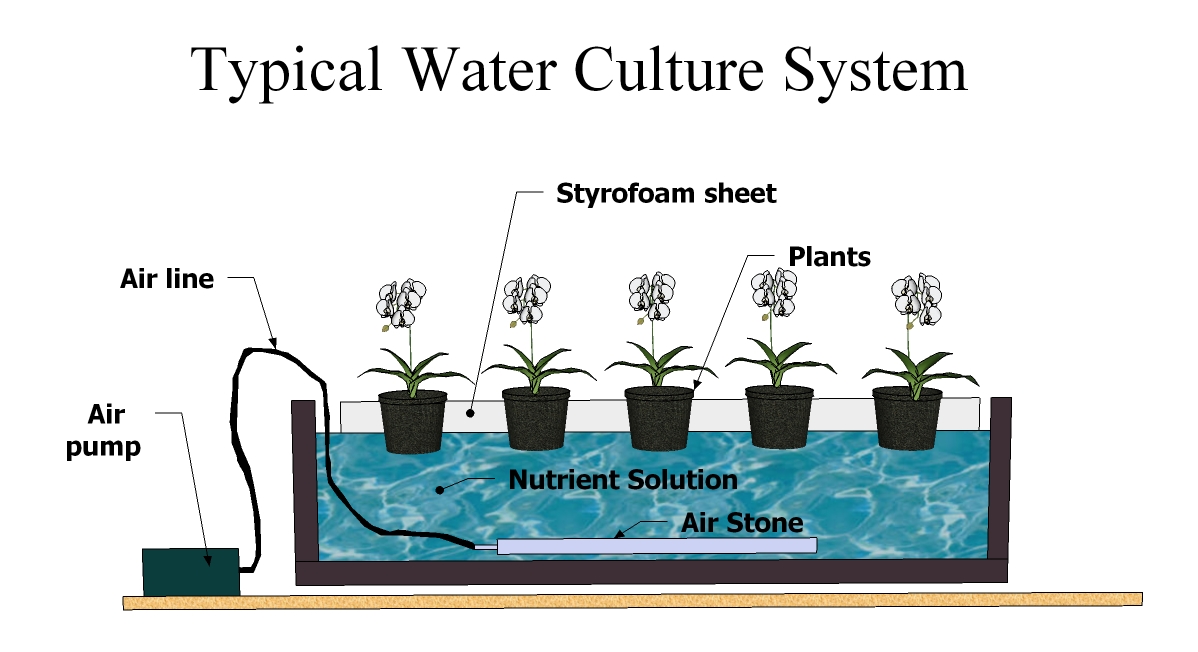
Many hydroponics enthusiasts like to build their own hydroponic systems so they can customize each part for their individual growing needs. One of our forum members posted some great information and pictures of his setup that we wanted to share on the blog.
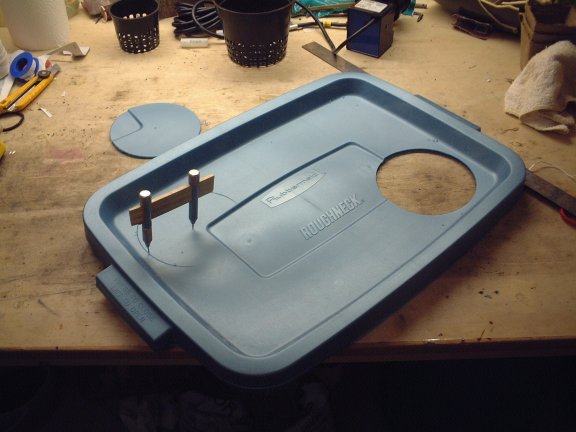
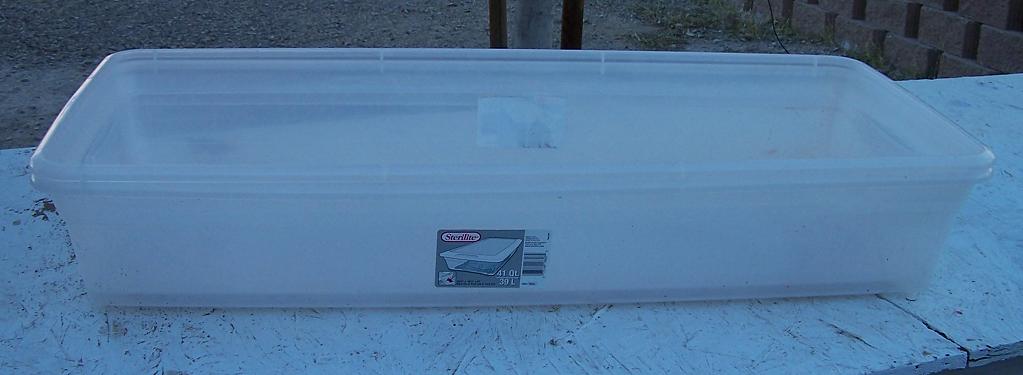
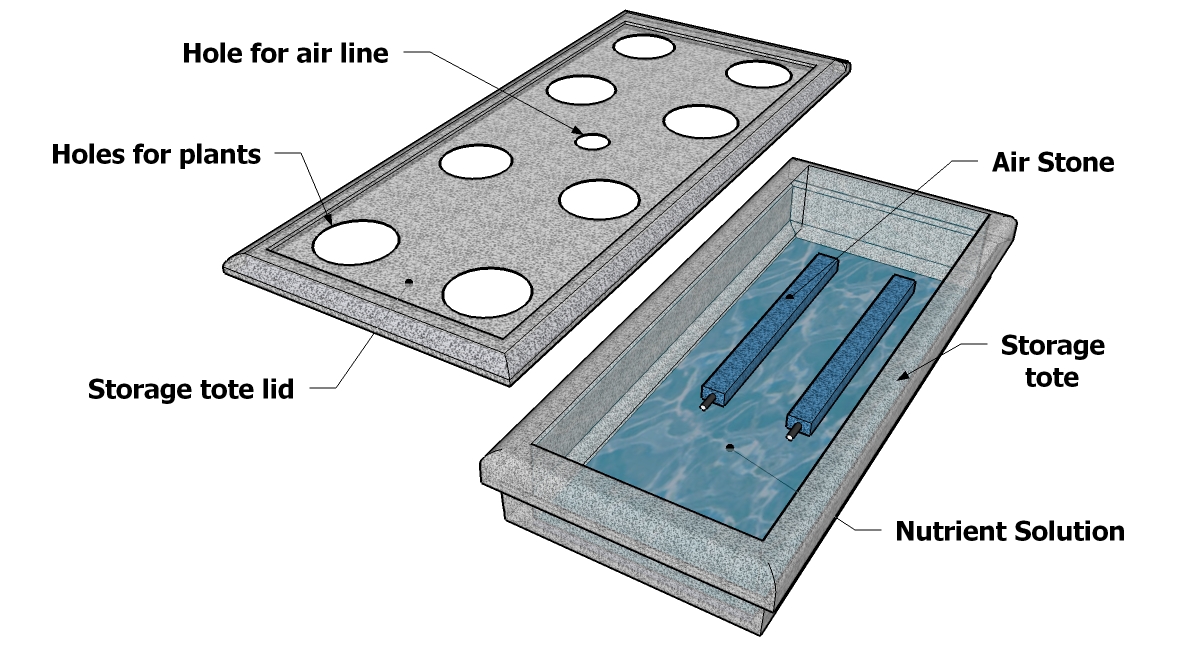
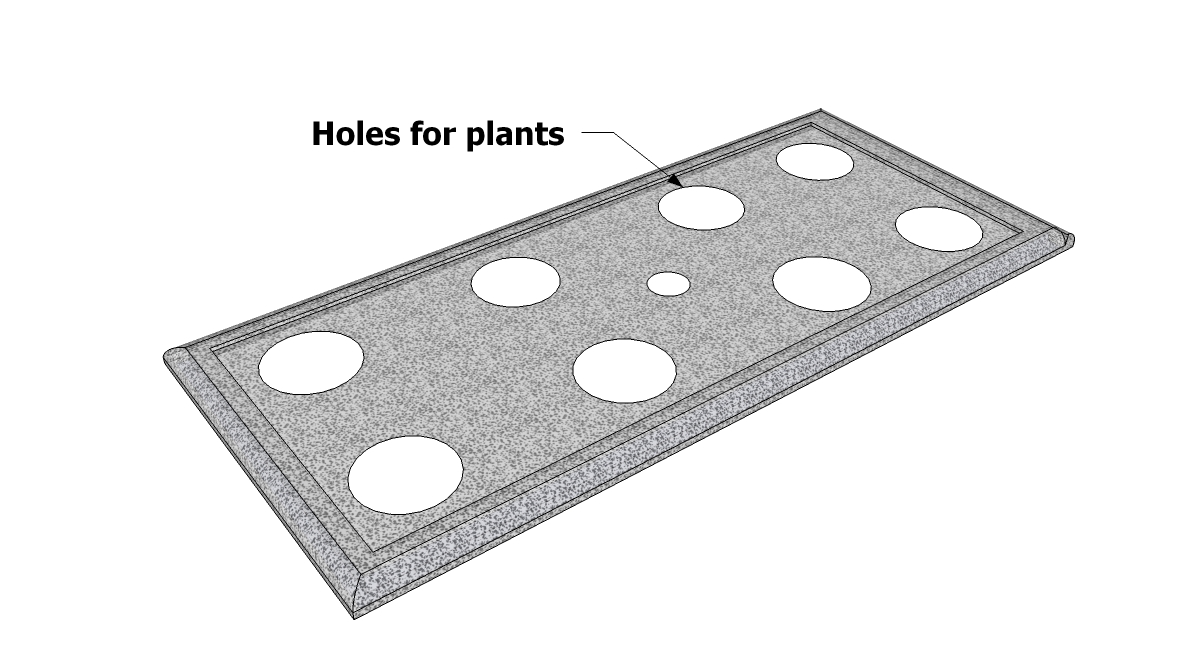
Cutting holes for the plants in rubbermaid containers
I came up with the compass cutter from a tool I purchases to draw 6 foot radius circles for a stained glass church window I made. The tool is designed to hold a center point pin and lead that is used for a Schaffer mechanical pencil. The tool fits on a yard stick I modified it by taking the lead out and replacing it with a finishing nail sharpened on the end used to score repeatedly the rubber maid lid till it cut 1/2 way through, then it was scored from the other side till it caused the cut out to separate from the lid.
The rubber maid material is easy to score like this – but if you try to use a drill, spade bit or hole saw it will fail, and rip the rubber. It might be possible to hole saw it if the lid is sandwiched between plywood to this catching and ripping. Test holes after each cut. I give the holes a light sanding to remove any left over debris from the cut.
A spade bit the one that has tabs on the outer edge of the bit that cuts in about 1/32″ almost and the thickness of the material. The thickness is about 1/8″. So if you cut a little from the front, then a little from the backside it will produce a perfect hole and not rip the container and set you back a few bucks. Note there was no material removed from the center of the hole, be gentle.
Drainage Hole Cutting
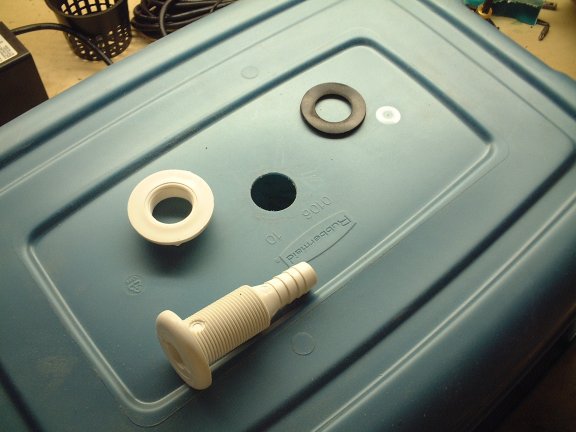
Pictured below is a very handy fitting for connecting a leak proof drainage hole. Make sure you have 2 rubber washers on the inside of a container with a curved surface – this aids the seal on the curved surface. I apply a little bead of silicon to the surfaces that will come in contact with the inside surfaces, this includes between the washers. On the barbed x thread x flange fitting the big white fitting here – for lack of a name…I will place some silicon then add the rubber washer. Use a slot screw driver to push the washer up against the silicone surface gently – then silicon the second rubber then attach the drain fitting to the storage device pail -bucket – etc. Remember the rubber fittings against the flange go on the inside of the pail…Watch it closely as you tighten the nut on this fitting – the silicon will have a lubricant affect and over tightening may cause the washer to slip out – you can tighten more if needed when the silicon is set.
Piping and Aeration
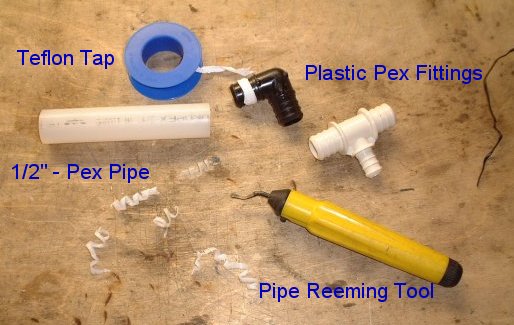
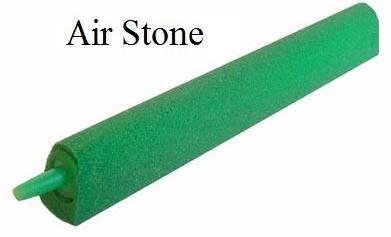
Installing the aeration system under the lids in the chamber of the roots, I did not want to use metal – In this system — there will be no contact of metal with solution period… So I came up with a push fitting using the plastic pex fittings with pex pipe – these are very cheap for me so I use them.
First if you put a pex (from now on it is assumed plastic) fitting in to the pipe it is not very snug. So if you want it more snugger…lol… you will need to wrap it with Teflon tape – BUT if you push it in to pex pipe it rips the Teflon tape and the seal is compromised. So – use a means by which to camber or bevel the inside edge of the pex pipe, I use the yellow reamer. I use the reamer to bevel the inside edge of the pipes to allow the Teflon taped fittings to insert in to the pex pipe with little damage to the seal. A little lubricant is ok like a very very very tiny amount twisted on to the tape on the fitting will encourage the seal but very very little is needed…It never hurts to expose the pipe to hot water to make it pliable.
Nutrient Pump
The nutrient pump in an old Wine Kitz primary fermenter, or just call it a 5 gallon bucket… After the plug and 3/4″ pex and an air hose is feed through the hole in the lid there is little room for anything else. There is a shut off valve on the riser off the pump I am going to use it for discharging the reservoir. In the yard there is a drop in elevation of at least 4 feet with out setting up a level and transom so siphon action should help speed this up, I will probably put in a shut off on the feed side to assist flushing out the nutrient solution every 10 to 14 days.
Cloning is a type of plant propagation takes a growing portion of a plant – a stem with some leaves attached, and helping it to become a new plant that is genetically equal to the plant from which the clone was taken from. This fairly easy to perform because plants frequently clone themselves in the wild, also know as asexual reproduction. Hydroponic gardeners often use cloning systems to facilitate the cloning process and share cuttings and divisions as a way of sharing plants with their friends and colleagues.
A stem cutting is a terminal growing point on a plant that is 4 to 6 inches long and is cut off at a node, the point where a leaf is attached to a stem. The lower leaves are removed from the nodes and the lower end is inserted into the hydroponic medium. The principal requirement for taking clones is a obtaining them from a healthy plant. The parent plant should be in good health and should have the characteristics desired for in the new plants. The donor plan should be at least two months old and still in the first stages of vegetative growth.
Before cutting the donor plant prepare a humidity tray by soaking some growing media some hydroponic nutrient solution. Once the growing media is dampened you should poke holes in the media to prepare for the clones. Put the tray on a propagation heat mat and cover with a plastic dome to start warming the hydroponic medium. The ideal method of cutting off a clone is to cut a short piece of a growing stem with a few branch points on it, which will usually only have leaves coming out of them. There are many complete hydroponic cloning machines and plant cloning kits available at different levels of cost that make the cloning process very easy and somewhat automated.
Continue reading Plant Cloning Hydroponics Tutorial
The General Hydroponics AeroFlo2 18 pod growing system comes with a 17-gallon reservoir and 18 plant sites, the AeroFlo² 18 site is a good starter system for those who want a compact, high performance hydroponics system that is well-suited to growing lettuce, basil, and other small plants up to three feet in height.
The AeroFlo² 18 is 2′ x 5′ 2″ and includes the following items in the box:
• 17 gallon reservoir
• Three 4 ft. grow chambers
• waterPower 120 pump
• injection manifold
• support structure
• 3″ grow cups
• CocoTek Coco cups and Hydroton
• 3 part Flora Kit
After un-boxing all of the parts, assembly is fairly simple and straightforward as the i

nstructions include detailed pictures and diagrams showing each step needed to get the system up and running quickly.
The reservoir is setup first by installing the hydroponic pump, drain plug and top cover. Next the growing chambers are place on the support legs and associated piping is connected to the pumping system. The reservoir should always be drained first before draining the growing chambers. This will prevent overfilling of the reservoir and possible flooding.
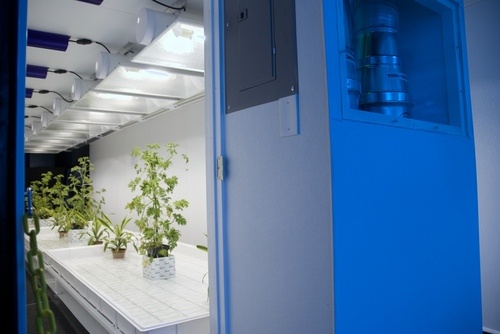
Plentiful light, appropriate temperature and sufficient ventilation are critical for fast growth, healthy hydroponic plants and higher yields. Hydroponic exhaust fans can be used to increase airflow around the plants. Make sure to position the AeroFlo system in a warm, well-lit, well ventilated setting, such as an outdoor garden, sunlit window, patio or greenhouse. For indoor settings use the appropriate grow lights to supplement for the lack of sunlight.
Proper hydroponic nutrient solutions are essential for the accelerated performance of mineral nutrients enriched with the healthy, flavorful characteristics of organics. Keep the nutrient solution temperature below 75° F and change the nutrient solution every 7-10 days. Top off with fresh water between nutrient changes and keep the nutrient solution aerated for best results. The pH of the nutrient solution affects the availability of the elements contained within so make sure to maintain the hydroponic nutrient pH between 5.5 – 6.5.
|
|